
The reality of asset bottlenecks
Building an indie game is a grind. Between coding and marketing, drawing every frame of a walking animation is often the first thing to kill a project's momentum. Using pre-made sprite packs is a practical way to keep moving without burning out on asset creation.
I understand the desire for complete creative control. Many developers want a unique visual style that’s entirely their own. But consider the cost. Custom art can be expensive if you’re outsourcing, and incredibly time-consuming if you’re doing it yourself. A well-chosen sprite pack offers a solid foundation, allowing you to focus on gameplay and other critical aspects of development.
Beyond time and money, sprite packs offer consistency. Maintaining a unified art style across all your characters and objects is surprisingly difficult. A pre-made pack ensures a harmonious visual aesthetic with minimal effort. Plus, iterating on existing sprites is often easier than rebuilding from the ground up. Need a slight color variation or a new animation frame? It’s far less daunting than starting over.
Solo developers, especially, benefit enormously. The sheer workload of a solo project is immense. Using a sprite pack can free up valuable time and energy, allowing you to actually finish your game. It’s about making pragmatic choices to maximize your impact and bring your vision to life.
Licensing without the jargon
Navigating sprite pack licenses can feel like deciphering legal jargon. It’s a critical step, though. Ignoring the terms could lead to serious legal trouble down the line. The most common licenses you’ll encounter are CC0, Creative Commons with Attribution, and full commercial licenses.
CC0, also known as "Public Domain Dedication", is the most permissive license. Essentially, the creator waives all copyright rights. You can use the sprites in any way you want – commercial or non-commercial – without attribution. It's the gold standard for ease of use, but remember, the original artist still isn’t responsible for any issues that arise from your use of the assets.
Creative Commons licenses with attribution require you to credit the original author. The specific terms vary, but usually involve including a link to their portfolio or website in your game’s credits. This is a reasonable compromise and supports the artist’s work. Be sure to check the specific CC license details, as some may also restrict modifications or commercial use.
Finally, full commercial licenses typically require a one-time purchase. These often offer the most flexibility, allowing you to modify and redistribute the sprites without attribution. Always read the fine print. Some licenses may restrict use in certain types of projects or have limitations on the number of copies you can sell.
- CC0: You can use these for anything without giving credit.
- Creative Commons: Attribution required, check specific terms.
- Commercial License: One-time purchase, typically most flexible.
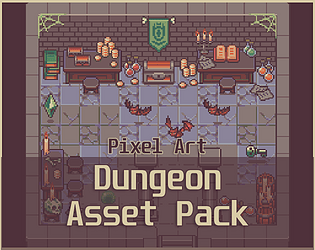
Top Sprite Pack Sources for 2026
When it comes to finding quality sprite packs, itch.io and CraftPix.net stand out. Itch.io is a haven for indie developers, offering a vast selection of both free and paid assets. CraftPix.net focuses specifically on 2D game assets, with a reputation for high-quality graphics.
Kenney’s Assets (kenney.nl) are a consistently excellent starting point. While not exclusively sprite packs, Kenney provides a massive collection of free, CC0-licensed assets, including character sprites, tilesets, and UI elements. The style is simple and versatile, making it a great choice for beginners or projects with a minimalist aesthetic.
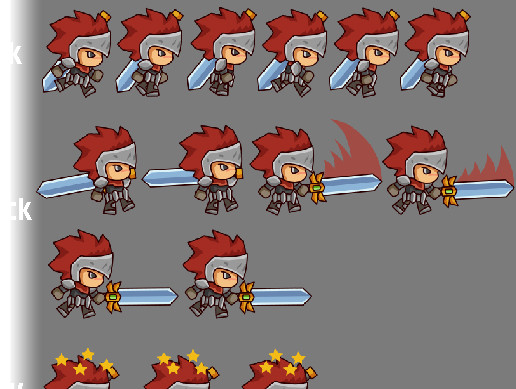
CraftPix.net’s "Fantasy Characters" pack is a strong contender for RPGs and adventure games. This pack, available for $19, includes over 100 sprites with various animations and character classes. The art style is detailed and expressive, though the license requires attribution.
"2D Platformer Assets" by Pixellicious (itch.io) offers a comprehensive set of sprites for creating a classic platformer. For $15, you get over 200 sprites covering characters, enemies, and environmental elements. The pixel art style is charming and nostalgic.
"Sci-Fi Characters" from GameDev Market (via CraftPix.net) delivers a futuristic aesthetic. Priced at $29, this pack includes detailed character sprites, weapons, and accessories, suitable for sci-fi RPGs or shooters. The license is a standard commercial license.
"Top-Down Shooter Assets" by Bruliam (itch.io) is a good option for top-down shooter projects. This pack includes character sprites, enemies, projectiles, and explosions. The pixel art style is gritty and realistic, and the license is CC0.
"Forest Tileset" by BitGem (itch.io) is excellent for environment building. While not strictly character sprites, it provides a strong foundation for creating immersive forest levels. The sprites are well-designed and versatile, and the license is CC0.
"Adventure Sprite Pack" by Elscall (itch.io) is geared toward classic adventure games. It includes hero sprites, enemies, and items, all in a charming pixel art style. The license is Creative Commons with attribution.
"Modern City Pack’ by FinalBoss (CraftPix.net) is a more recent addition, offering sprites tailored for modern settings. This pack is priced at $25 and features a clean, detailed aesthetic. It"s suitable for games set in urban environments.
"Cartoon Characters" by GrafxKid (itch.io) provides a lighter, more whimsical style. This pack includes a variety of cartoon characters with expressive animations, ideal for casual games or children's titles. The license is CC0.
Pixel art vs. vector
The choice between pixel art and vector graphics significantly impacts your game's visual style and technical requirements. Pixel art evokes a retro aesthetic, reminiscent of classic 8-bit and 16-bit games. It’s often favored for its charm and simplicity, but scaling pixel art can be problematic. Enlarging a pixel art sprite results in noticeable pixelation, which can look blurry or undesirable.
Vector art, on the other hand, is resolution-independent. This means it can be scaled infinitely without losing quality. Vector sprites are crisp and clean, making them suitable for games with a modern or stylized look. However, vector art files can be larger than pixel art files, potentially impacting performance, especially on lower-end devices.
For genres like RPGs and platformers, pixel art often feels natural and fitting. The retro aesthetic complements the gameplay mechanics. For more visually demanding genres like strategy games or simulations, vector art can provide a more polished and professional look. Ultimately, the best choice depends on your artistic vision and technical constraints. I believe it’s more about the execution than the inherent superiority of one style over the other.
Consider your target audience, too. Players who grew up with classic games may appreciate the nostalgia of pixel art, while others may prefer the sharpness of vector graphics. There’s no right or wrong answer, only the best fit for your game.
Animation Considerations
Pre-made sprite packs often include basic animations – idle, walk, jump, attack – but the quality can vary significantly. Pay close attention to the smoothness of the animation, the number of frames, and the overall fluidity of the movements. A poorly animated sprite can detract from the overall visual appeal of your game.
Look for packs that include keyframes – the most important frames in an animation cycle. Well-defined keyframes make it easier to add custom animations or modify existing ones. Also, check the frame rate. A higher frame rate generally results in smoother animations, but it also requires more processing power.
If a sprite pack lacks the animations you need, you can always create your own. Tools like Aseprite and Spine are specifically designed for sprite animation. These tools allow you to create custom animations from scratch or modify existing sprites. However, this adds to the development time and requires artistic skill.
Integrating Sprite Packs into Unity
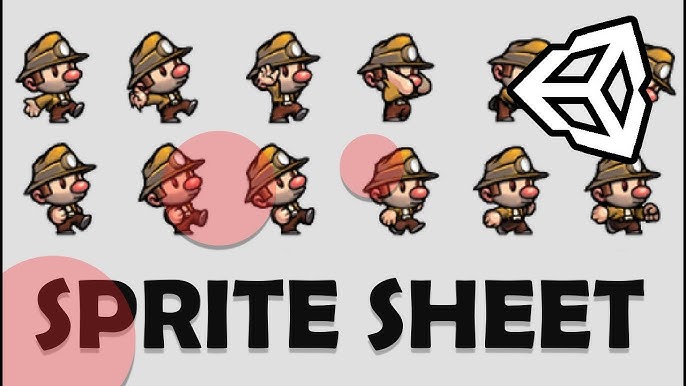
Importing sprite packs into Unity is generally straightforward. Simply drag and drop the sprite sheets or individual sprite images into your project’s Assets folder. Unity will automatically detect the sprites and create Sprite objects.
To optimize performance, consider using sprite atlases. Sprite atlases combine multiple sprites into a single texture, reducing the number of draw calls and improving rendering speed. Unity provides tools for creating and managing sprite atlases. You can configure the atlas settings to control the texture size, compression, and filtering.
Creating animations in Unity involves setting up an Animator Controller and defining animation clips. You can import pre-made animations from the sprite pack or create your own using Unity’s animation timeline. Be sure to adjust the animation speed and loop settings to achieve the desired effect.
Texture compression is another crucial optimization step. Unity offers various compression formats, each with its own trade-offs between file size and image quality. Experiment with different compression settings to find the optimal balance for your game.
Beyond the Basics: Modifying and Expanding
Even the best sprite pack might not perfectly match your vision. Fortunately, modifying existing sprites is often easier than creating them from scratch. Tools like Aseprite and Photoshop allow you to edit individual pixels, change colors, and add details.
Color swapping is a simple but effective way to create variations of existing sprites. For example, you could change the color of a character’s clothing or armor to create different outfits. Adding details, such as scars or tattoos, can also help to personalize your sprites.
If you need to create entirely new sprites, try to match the style of the original pack. Pay attention to the color palette, line thickness, and shading techniques. Maintaining a consistent art style is crucial for creating a cohesive visual experience.
Don't be afraid to experiment. Sprite editing is an iterative process. It may take some trial and error to achieve the desired results. The key is to start with a solid foundation and build upon it.
No comments yet. Be the first to share your thoughts!